Sunday, May 23, 2010

Super-Powered Goggles

I broke down and made some goggles! Ones that actually improve my vision, by accident (see below). We had a night for goggling at the AHA! Shop. Would that I had brought my camera... these are all progress shots from later.

The backing piece is thick ruddy suede, part of a large cache I procured from the Scrap Box a while back. On the left (right eye), we have half a silver-plated napkin ring, with a piece of stainless steel plate soldered in, plus a ring bearing, surrounded by excess solder. On the right, some more steel plate riveted on, with pinholes drilled in... surmounted by a clip-on jeweler's loupe. In the forehead is a brass grommet / third eye aperture. (This project was excellent practice with pop rivets and grommets, both of which are a lot of fun. No wonder I've never gotten good at sewing.)

The left-side pinholes have the curious property of augmenting my vision. My sight isn't terrible, but I can't wear glasses with the goggles. But the pinholes' small apertures restrict the angles at which light can enter the eye, making things clearer. I spent a lot of yesterday comparing eyes; they're usually pretty identical in ability, but with these on I can read things with my left that are blurry through my right, even when I squint. Once I noticed the effect, I remembered reading about pinhole glasses some years ago, but had completely forgotten that until now. Serendipitous!

Originally, both eyes were to be halves of this napkin ring. It came from Antelope Antiques, where the shopkeeper started polishing off the tarnish despite my protestations... but it still looks lovely. I hacksawed it in half (on an angle for face-fittage), cut it to shape with some metal plate snips, then smoothed the edges with a metal rasp.

The left eye was going to be covered with more steel, like so... but I couldn't get it to attach properly, so the plate went on instead. The right-eye napkin ring is attached by tabs of the suede backing.
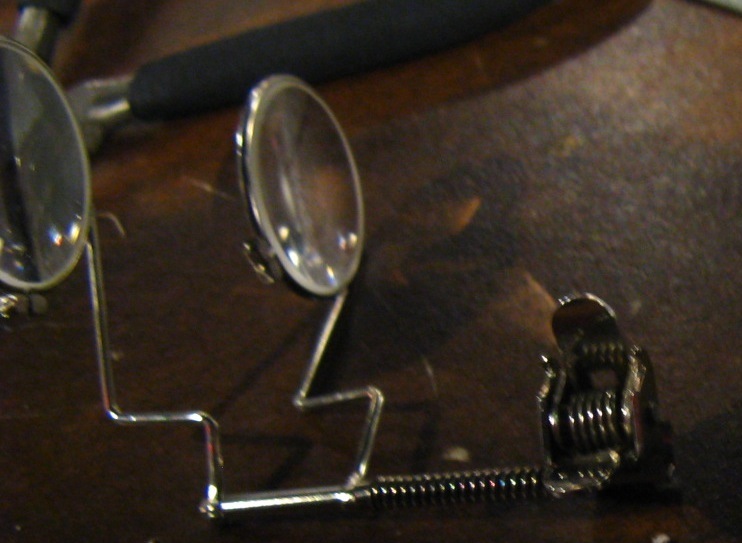
I bent the stems on my loupe so the lenses sit in front of my left eye when it's clamped to the side strap. Enjoyable!

Interlude I: Noam Tries to Lick the Plasma Light Bulb

Interlude II: Nate's Sweet Goggles
Sleepy Nate used brass and rubber plumbing gaskets, set in tan suede. His goggles have a dust mask that can be detached from the right side, to hang out of the way when not in use. (Picture by Noam)

Back to the main feature...
I used a couple of electrical clamps on each side, which not only looks awesome but also provides some adjustability. Attaching these to the strap proved to be the main stumbling block, and the reason why I stalled for a week before finishing them for the Hands-On Museum Local Tech Event last night. (AHA! and 826michigan shared a booth, thanks to sponsorship from Tom Root... more info about our project later.)

The holes in the clamps were too small to push rivets through, and I couldn't find a working drill for many a tiresome day. Once one was located, that and a triangular metal file made the job rather easy (although the rivets barely made it through the whole thickness of leather and metal).

Copper pop rivets installed!

Plate side, minus the loupe (which I do think adds a lot).

I also added some decorative rivets and a mended tear on the right side. Can't have my battle goggles looking shiny-new.

Goggle pics from the Local Tech Event... these were taken with my near-IR webcam and run through Quartz Composer. Further details to come...
Happy happy

I love this picture :D
We were stationed across from Current Motor Co., represented at the event by John Harding, who gave an awesome presentation at Ignite 3 in March. I wandered over and saw the sweet "inverted" motor (ring of magnets on the outside, coils on the inside) that drives their wheels. That's their motorcycle on the left. Mmmm pretty.

Stay tuned for Rotary Ruminations (Sorta) and Robo-Vision!

Tuesday, April 20, 2010

Musical Cyborg Juggling Apparatus


6 1/2 hours in the AHA! Shop and a chocolate-peanut-butter sandwich brought us to this. I'd been stalled out on the method for weeks, and then the clouds suddenly broke, early on April Fool's Day.

So what is this? It is a harness that turns the action of juggling into buzzing noises, flashing LEDs, and arcing electricity. Each palm has two separate copper wires exposed, one of which is hooked up to the positive terminal of a battery, while the other connects to a motor (or bank of LEDs, or people-shocking device). When the wires are bridged by a tinfoil-covered juggling ball, the circuit is closed and the motor (people-shocker, eye-blinder, etc.) runs. Thus, the juggling becomes a method of switching things on and off... like so:
...ish.

And this is what it actually looks like... somewhat less elegant, perhaps. At the top left, we have the left glove with a conductive ball bridging its contacts; below that, a taped-up 12V battery pack (the brown/blue block); then, the box itself. Most of the apparatus is externally mounted. Magnets glued near the four central motors anchor metal bolts, which are struck by the spinning zip ties to create a variety of buzzing sounds (sample mp3!). From the bottom left emerge wires from a shocker, which discharges a decent amount of voltage (I forget how much) across the blue and white wires' stripped ends. It will arc up to about 1cm through the air, which looks pretty sweet, and also give you a pretty hefty shock. (Me holding one contact + Amanda holding the other + proximity -> lightning hands!)

Not pictured: burned-out LED bank... I am not yet wise in the science of adding resistors. But a new, more awesome version is on the way.

The box belts to my waist, and...

suede straps anchor the wires to my arms.

Prototype glove... wire contacts wrapped around a scrap anchor on the inside. Jabby.

Suede glove #1 in production!

Maille rings and thread hold the wires in place. Juggling gloves: now with 50% less pain!


Balls: socks + washers (for heft) + duct tape (for cushioning and adhesive) + tinfoil.

So, there is currently a glove for each hand, plus these:
Finger-contacts! These copper rings are a pain, both figuratively (the donning/doffing process is tedious) and literally (they have a tendency to channel voltage straight through my fingers, resulting in anguish and blisters). But they look... kinda awesome.

I brought this machine to exhibit (with AHA!) at TEDxUofM, which was pretty stupendous. My favorite presenters were John Holland, Udae Sandhu (who voiced basically my current philosophy of happiness), Jacob Mendel's "Zlatá Rybka" video, Mason Proper (!!), Matt Shlian, and Alex Wand (with his awesome marimba-bowing musics). Yesssssss.

AHA! and the Apparatus will also be making an appearance at several future DIY/tech/Maker events, including the Hands-On Museum's Tech Event (May 22), the Ann Arbor Mini Maker Faire (June 5), and hopefully the Detroit Maker Faire (July 31 - August 1). Actually, this post is part of my application for Detroit... I anticipate all three being fantastic.

Friday, March 19, 2010

(Do Breadboards Dream Of) Electric Jam

IT LIVES!


Last Saturday, I finished Make's crackerbox amp project. This is extremely exciting, as it represents a) a successful first foray into the twin lands of circuit diagrams and building electronics from scratch, and b) the actualization of my own electric mandolin!

Janky janky janky. But it works! (I had very limited wire resources... hence, everything is the same color.)

This soldering job reminds me of Kate Beaton's fat pony: ugly and incompetent, but kind of endearing...

While Make seems to have some kind of sponsorship thing with Radio Shack, I don't recommend going there for parts. I moseyed down there one evening, and walked out feeling like I'd lost two hours (including bus time) and spent twice as much as I should've for the components I got. Even if you go online to avoid getting ripped off as much, it could easily cost more than $5 if you don't have most of the stuff already on hand. Still, no complaints - I ended up with this...

:)

The best reference material came from http://www.kpsec.freeuk.com/ . Amazing resource for semi-newcomers to the field of electronic jiggery-pokery. I also highly recommend checking out cairn's comments / linked PCB layout pic on the article page. While it was fun to slowly learn how to read the circuit diagram, at times it got extremely frustrating; I found that layout diagram once I was done, and kinda wished I'd had it all along. (Still, it was gratifying to turn the thing on and have noise come out, when I'd wondered if it would do anything but set the carpet on fire.)

With the piezo mounted! I tried poking/cutting holes in the speaker cone for more distortion, but it doesn't seem to make much of a difference... perhaps because I only have an 8-ohm speaker. It came from the local Kiwanis rummage sale - they have a bunch, and I paid a solitary buck for this one.

This amp exists mainly to give grittiness and edge to the mandolin, and that it does, most noticeably in the upper registers. I chose to use surface-mounted pickups because there's no way I'm taking a drill to the mandolin. So I'm going with a piezo wired to a 1/4" plug, courtesy of the excellent Matt Endahl.

Next step: build a case for it. I settled on some 2-walled plastic with linear cells, which David and I pulled out of the art museum dumpster a while back.

Piezo pickup with plug, duct tape, box cutter, Sharpie, nail sink, amp, plastic.

Cut the plastic into three panels, for optimal stability (that whole 3-legs-don't-wobble thing)... plus mega style points.

Top and bottom covers (the top flaps open); speaker hole cutout.

Duct tape "hammer" + nail sink + needlenose pliers -> easy holes, exactly the right size.

Loud = volume, Angry = gain :)

A lot of people asked about volume vs. gain. As I understand it, the chip already amplifies input sound by a certain amount. The gain feeds from the chip back into it, so that basically controls how much the chip amplifies the signal (sound). (Past a certain level, this creates clipping, which makes it sound gritty.) The volume is between the chip and the speaker ("after" the chip), so it controls how much of this already-amplified signal is put through the speaker.

Left side: on/off toggle, 1/4" jack
Center: volume rheostat, gain potentiometer
Right: speaker
Bottom: PCB, 9V battery

Finished! Here's a short sound sample with the mandolin. There are some images up already on Facebook, as I brought it to Build Night last night at AHA...

Rocking out (as best I am able) at the shop.

We also taped it up to the illustrious Amanda's amazing propane tank steel drum. That thing sounds amazing, though as with the mandolin, only the higher registers worked with the amp's distortion. Apparently, I can switch out one of the capacitors, and it'll pick up more bass... so I guess that's a logical next step with this thing. I already tried hooking up some red LEDs inline with the speaker (so they'd pulse along with the sound), but alas, they were too much of a voltage drain and barely any sound came out.

The last couple of photos are from AHA's Facebook page; I believe they were taken by Josh, one of the proprietors of Digital Ops, our venue. I am inexpressibly happy that this space, the group, and the people in it exist. Dudes are seriously awesome.

Sunday, March 14, 2010

Nobody understands meeee

...though mainly because I sing in made-up languages.

I've been having pretty good times lately. The days are particularly grand when I can get a reservation for the V-Room (UM's sound recording booth). I finally recorded three folk songs I wrote while studying abroad in 2008... the vocals are dodgy as always, but I think the language alone gives these interest. They're written in my conlang, mazlaani. The tunes are stolen from other places; lyrics and loose translations follow... click the song titles to download, or here to listen to all of them on Posterous.

Inothaye eila hi fari - Tune: Navan, "Seoithín, Seothó"


Inothaye eila hi fari
A’santu mari imkarenni
Inothaye eila hi fari
Kaadie tsuoheta leme eiyon
Xiyora lorelea oreni
Lentah pakaiyu sefura faa siten
Xiyora lorelea oreni
S’akal naarana kte’u
Inothaye eila hi fari
A’santu mari imkarenni
Inothaye eila hi fari
Kiie xituran oreni ridae.
To wander this land is good
This is a place of peace
To wander this land is good
Green leaves filter creamy light
I drink in the richness of the days
My feet walk in cool water
I drink in the richness of the days
High sunlight warms my skin
To wander this land is good
This is a place of peace
To wander this land is good
And I have days to wander.


Chilun tumnanaii - The Chieftains, "Don Oiche Ud I mBeithil"


Elemnen kiranaiyo
Kinarolan s’amna me
Ruuara-tsorun xala,
A’sachti faa lihte hou.
A’quuro s’idusa faa
Saahta rochai’an;
Janaï-to lonn faa charam
A’chairechta kummnaou.
The embers of summer sleep under fallen leaves
When I inhale, I awaken
and my breath is mist on the wind.
A fire begins to ignite itself in the air;
Sparks drift red from high branches in the twilight.


As'ailu xirhara lani - Ugnëlakis su Kûlgrinda, "Skauda Galvelá, Negaliu"


As’ailu xirhara lani
Fairech naarai tumnanaii
Xolts’e o rinta leai
Reiya petuvin xani, pexeiya

Inlaat xe xiute raas’in
Rilun, razlaani a’xalsin
S’e o s’inna kinuta’u
Faolan, o eila-urun xa s’inna

Pala’u tchenden nolurinna
Xatou as’tir tuorunna
Qulann'u s’estoh yunao
Lechat’u seiyonna ochai

O as’ach as’ailra saati?
Taapra canssto, taapra s’altï?
Tsuohe-urun a laanti;
Tukran-to s’aarai eila...
From my window I see them,
Sparkling with autumn sunlight.
I would go and run with them,
but cannot; it is not given to me...

How can I stay and whisper?
Now I want to speak, to sing.
The world will see my heart beating!
The whole world will see me.

My drum is the storm’s lightning;
I wear the mountain’s gale.
My music is the beating rain,
My torch is the moon’s flame.

Will my eyes turn back to the window?
Is home a friend or an enemy?
Now all the leaves are falling,
The world gleams copper...
Someday I will add backing to this song; right now, I'm thinking tambourine, electric mandolin, and electric mediocre viola. (More on these later...)

Upon reflection, I think I subconsciously stole a couple of words from Elvish: check "laanti" (they fall), with Tolkien's "lantar" (same), as well as "oren"/"aurë" (day). This is not at all surprising, and as any giant dork will observe, the themes are also pretty similar. I wrote a lot about autumn because I had none that year, being in the southern hemisphere for five months; the vocabulary is also limited, because of the size of the language so far.

•••••••••••••

There's more in the offing, but I can't give away all my secrets at once. I'm planning some fun stuff for the Maker Faires this summer (A2 Mini and MakerCity in Detroit)... definitely working with the AHA! Shop, possibly the Hands-On Museum, and/or a couple other excellent peoples. It will be a good season.

[Side note: AUGH FORMATTING... I will try and fix this, but no promises. ;_;]

Wednesday, March 10, 2010

Juggling balls (Part 2)

These juggling balls are more time- and labor-intensive than the others, but you end up with a much warmer, more personal final product. They're basically hacky sacks, but for juggling you need 3+.

My first attempt / only complete set so far.

There are various ways of making these; the general idea is that you're making a soft cube, so you need six squares in some configuration, plus some space for the stitches to hold. I use two rectangles of suede for each ball, each 3 squares long (kind of like baseballs). You can also use three rectangles of two each, or two L-shaped pieces of 3 each. Or whatever else your little heart desires. All it really affects is the pattern of the colors.

1 red-orange and 1 sage green for each ball. The balls in my original set are filled with black beans, which produces a very pleasant noise. Now I'm trying to make some with jingly bells inside, which will sound sort of rattly when muted by the stuffing... kind of meh, but it'll provide variation. These are for use in juggling rhythms (I've gotten a bunch further since that video... exciting).

Materials!

I'm using doubled thread to sew the edges together, with about 1/4"-1/2" of edging. As with most needle-and-thread projects, this is sewn inside out, except for an opening, then inverted and finished.
Halfway through...

End of each rectangle attaches to the middle third of the other. Suede is a bit more finicky than the cloth I used before; I had to cut a small triangle from each straight edge where it folded around the corner of the other rectangle.

Flipped...

...and inverted. This is just to show what it should look like - a couple more sides need to be sewn before this can be finished. Not all my projects can be fantastic successes, and I ended up abandoning this ball because the suede was too thick and stiff to invert through the hole I had left, at least without undoing a lot of previous stitching. This also happened because I used smaller rectangles than before, which provides less leeway: 1.5-inch squares (so 5.5" x 2.5" rectangles, including 1/2" of slip), instead of 2-inch squares (7" x 3" rectangles). I didn't want to have to stitch up a whole side from the outside, as my attempts at "pretty stitches" usually produce the following:

These are the stitched-up holes from the first set, after stuffing the stuffing in. (Note on that: put in much more stuffing than you think you need, so that the ball is quite taut. Failure to do so will resort in a loose final product that expresses ennui, rather than exuberance. You want EXUBERANT BALLS.)

I'm happy sticking with these ones, as they are very aesthetically pleasing to me. Each has one rectangle of red-on-blue brocade, and for the other rectangle, they have burgundy suede, iridescent red/black cloth, and the reverse of the brocade (blue on red). Hey kids, patterning is cool. B)
Ugly stitches: EXTREME CLOSEUP

Thursday, February 25, 2010

Holograms!

A full set of awesome photos to accompany this can be found on Facebook (public link). There is some basic information there; this entry is more in-depth.

Feeling artsy-fartsy? Wanna play with LASERS? Make holograms! (Disclaimer: this actually takes quite a bit of equipment, which I sadly lack in any independent sense...)

This is the perfect art for people like me: arcane, extremely sensitive, involving complex machinery and glass plates,
shrouded in velvety darkness... there are lenses to adjust and light beams to guide, and at the end, a 3D illusion is captured in your hands.

These holograms (specifically, Denisyuk-type reflection holograms) are physically composed similarly to photographs: a light-sensitive emulsion in a thin layer atop a flat medium. In photos, of course, there's usually a middle step (the negative), and you end up with light-and-dark patterns on paper, whereas in holograms, the light produces ridges in the emulsion that act as highly complex lenses on a glass plate. Technically, the emulsion is also on the back of the plate - with the emulsion on top, you see the reverse image. You can see a "larger" part of a hologram from a small shard because it compares somewhat to a flashlight: your view of the object in that case is akin to a shaft of light beaming into darkness (anything that is not exposed emulsion). The hologram records the interactions between the
reference beam, or the spread-out direct laser beam (which, when you view it, is replaced by your light source) and the object beam, the light reflected back off of the object (which becomes the image you see). You are viewing a reconstruction of how the light reflects off of each part of the object. Since I was using a red laser, the finished hologram reflects this same wavelength of light - so the image looks red. Also, because of how it is constructed, a finished hologram is best viewed under light from a compact point source (like an incandescent bulb).

You may know that the word "camera" is short for "camera obscura", or dark room. Well, when you take a hologram, the entire room literally is the camera, and it contains the plate (vaguely analogous to photo film), darkness, the light source, and your subject. Your setup includes
a laser, a shutter blocking the beam, a mirror to angle it toward your plate, several baffles to block stray light, a spatial filter, the frame that holds the plate, and then your subject. (A diagram can be found here, though the spatial filter is missing - this is what spreads the beam into a cone.)

The spatial filter is a fun piece of equipment, which can take anywhere from a minute up to several tense, fiddly hours to set up. It's essentially a lens, or set of lenses, and a pinhole that you adjust to spread and focus the laser beam
(Mike made ours from old microscopes). The filter has to be aligned vertically and horizontally so that the beam goes straight through, as perfectly as possible, which is the fiddly bit. Once you have this done (on an extremely stable surface), spreading the beam should yield a series of light and dark concentric rings - interference patterns - because the light is passing through a lens. In the center is a bright spot. You move the lens closer to the pinhole until the bright spot is large enough to cover your subject. Then you close the shutter, turn off the lights, set your plate, and leave.

In order to produce a successful hologram of this type, vibrations and environmental light must be minimized. Blocking light is relatively easy: you set up
baffles to keep reflected laser light from hitting the plate, turn off the lights, shut the door, turn off the lights in the next room, and shut that door as well. Blocking vibration is more difficult; Mike Hannum, the awesome Residential College photo/holo prof, built three tables in the basement for this specific purpose. Each one has a bottom layer of 6 inner tubes, then layers of sand and tennis balls for dampening, then more sand and a thick slab of slate on top. It is recommended to work at night, when students are moving around less upstairs and the traffic outside quiets down. And once you've set your unexposed plate in the holder, you leave the room for five minutes to allow the air currents to settle before exposing the plate. Yes. The air currents.

(Do you see yet why I love this art?)

I always picked the table with a shutter switch located outside the room, so I wouldn't have to disturb this setup in order to take the image. Depending on the intensity of the light wash and the reflectivity of the subject, I typically exposed plates for between 5 and 30 seconds. Then, I slunk back into the room, blindly put the plate in a dark sealed box, and brought it out, ablaze with premature triumph. Occasionally, I would end up getting foiled somewhere along the way by developing the plate for the wrong amount of time (this also varies, depending upon the exposure time and such)... but I got some really nice ones along the way, and now I've found my favorite test plates from way back. These and some project materials are now up online, though most of my project work and some of my best overall holograms have been stored elsewhere or given away.

If you want to make simple 3D images but don't have the equipment, check out this awesome handmade hologram video David showed me a while ago... Also pretty frickin' sweet.

Thursday, February 4, 2010

Juggling balls (Part 1)

Warning: this post may provoke puerile giggling.

Last May, the excellent Bob tried to teach me to juggle. He lent me some balls for the day, and of course I immediately lost one. Now I seem to have recovered from those unfortunate associations, and have been learning to juggle for a couple of weeks. The results are surprisingly marvelous! (YouTube vid. Beware of ball hitting computer at the end...)

These balls are quite heavy, for two reasons: a) it makes them easier to handle as a starting set, and b) the fact that they work my hands/arms is a motivator for practicing. This set is made from latex gloves, filled with (dry) Quikrete. The bag coverings make them easier to handle and much more durable.

Materials: satiny bag, latex glove, Quikrete (and an empty medicine bottle for scooping)

Tie off the fingers.

I used maybe 4 scoops per ball; these photos are of a replacement ball (I lost one), and it ended up larger than the others because I didn't remember how much grit went into the old ones.

Hefty!

Satin-y! (Inside out, so it'll end up pretty. The bag is about twice as large as we need, so I twisted it around and stretched it back over itself, à la breadbags.)

Drawstring pulled tight and knotted; the last step is to tuck it into the fabric so the ball doesn't catch on things.

Final bonus: these make a very satisfying "tup" noise (now that I can actually keep them going without dropping them frequently).

Part the Second coming sometime, in which we explore the more effortful way of making these things...