 The backing piece is thick ruddy suede, part of a large cache I procured from the Scrap Box a while back. On the left (right eye), we have half a silver-plated napkin ring, with a piece of stainless steel plate soldered in, plus a ring bearing, surrounded by excess solder. On the right, some more steel plate riveted on, with pinholes drilled in... surmounted by a clip-on jeweler's loupe. In the forehead is a brass grommet / third eye aperture. (This project was excellent practice with pop rivets and grommets, both of which are a lot of fun. No wonder I've never gotten good at sewing.)
The left-side pinholes have the curious property of augmenting my vision. My sight isn't terrible, but I can't wear glasses with the goggles. But the pinholes' small apertures restrict the angles at which light can enter the eye, making things clearer. I spent a lot of yesterday comparing eyes; they're usually pretty identical in ability, but with these on I can read things with my left that are blurry through my right, even when I squint. Once I noticed the effect, I remembered reading about pinhole glasses some years ago, but had completely forgotten that until now. Serendipitous!
 Originally, both eyes were to be halves of this napkin ring. It came from Antelope Antiques, where the shopkeeper started polishing off the tarnish despite my protestations... but it still looks lovely. I hacksawed it in half (on an angle for face-fittage), cut it to shape with some metal plate snips, then smoothed the edges with a metal rasp.
 The left eye was going to be covered with more steel, like so... but I couldn't get it to attach properly, so the plate went on instead. The right-eye napkin ring is attached by tabs of the suede backing.
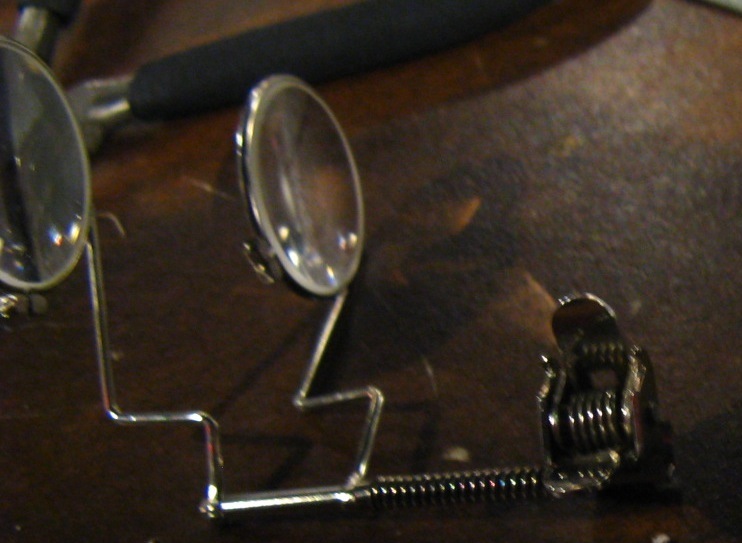 I bent the stems on my loupe so the lenses sit in front of my left eye when it's clamped to the side strap. Enjoyable!
Interlude I: Noam Tries to Lick the Plasma Light Bulb

Interlude II: Nate's Sweet Goggles
 Sleepy Nate used brass and rubber plumbing gaskets, set in tan suede. His goggles have a dust mask that can be detached from the right side, to hang out of the way when not in use. (Picture by Noam)
Back to the main feature...
 I used a couple of electrical clamps on each side, which not only looks awesome but also provides some adjustability. Attaching these to the strap proved to be the main stumbling block, and the reason why I stalled for a week before finishing them for the Hands-On Museum Local Tech Event last night. (AHA! and 826michigan shared a booth, thanks to sponsorship from Tom Root... more info about our project later.)
 The holes in the clamps were too small to push rivets through, and I couldn't find a working drill for many a tiresome day. Once one was located, that and a triangular metal file made the job rather easy (although the rivets barely made it through the whole thickness of leather and metal).
 Copper pop rivets installed!
 Plate side, minus the loupe (which I do think adds a lot).
 I also added some decorative rivets and a mended tear on the right side. Can't have my battle goggles looking shiny-new.
Goggle pics from the Local Tech Event... these were taken with my near-IR webcam and run through Quartz Composer. Further details to come...
 Happy happy
 I love this picture :D
We were stationed across from Current Motor Co., represented at the event by John Harding, who gave an awesome presentation at Ignite 3 in March. I wandered over and saw the sweet "inverted" motor (ring of magnets on the outside, coils on the inside) that drives their wheels. That's their motorcycle on the left. Mmmm pretty.
Stay tuned for Rotary Ruminations (Sorta) and Robo-Vision!


