A full set of awesome photos to accompany this can be found on Facebook (public link). There is some basic information there; this entry is more in-depth.
Feeling artsy-fartsy? Wanna play with LASERS? Make holograms! (Disclaimer: this actually takes quite a bit of equipment, which I sadly lack in any independent sense...)
This is the perfect art for people like me: arcane, extremely sensitive, involving complex machinery and glass plates, shrouded in velvety darkness... there are lenses to adjust and light beams to guide, and at the end, a 3D illusion is captured in your hands.
These holograms (specifically, Denisyuk-type reflection holograms) are physically composed similarly to photographs: a light-sensitive emulsion in a thin layer atop a flat medium. In photos, of course, there's usually a middle step (the negative), and you end up with light-and-dark patterns on paper, whereas in holograms, the light produces ridges in the emulsion that act as highly complex lenses on a glass plate. Technically, the emulsion is also on the back of the plate - with the emulsion on top, you see the reverse image. You can see a "larger" part of a hologram from a small shard because it compares somewhat to a flashlight: your view of the object in that case is akin to a shaft of light beaming into darkness (anything that is not exposed emulsion). The hologram records the interactions between the reference beam, or the spread-out direct laser beam (which, when you view it, is replaced by your light source) and the object beam, the light reflected back off of the object (which becomes the image you see). You are viewing a reconstruction of how the light reflects off of each part of the object. Since I was using a red laser, the finished hologram reflects this same wavelength of light - so the image looks red. Also, because of how it is constructed, a finished hologram is best viewed under light from a compact point source (like an incandescent bulb).
You may know that the word "camera" is short for "camera obscura", or dark room. Well, when you take a hologram, the entire room literally is the camera, and it contains the plate (vaguely analogous to photo film), darkness, the light source, and your subject. Your setup includes a laser, a shutter blocking the beam, a mirror to angle it toward your plate, several baffles to block stray light, a spatial filter, the frame that holds the plate, and then your subject. (A diagram can be found here, though the spatial filter is missing - this is what spreads the beam into a cone.)
The spatial filter is a fun piece of equipment, which can take anywhere from a minute up to several tense, fiddly hours to set up. It's essentially a lens, or set of lenses, and a pinhole that you adjust to spread and focus the laser beam (Mike made ours from old microscopes). The filter has to be aligned vertically and horizontally so that the beam goes straight through, as perfectly as possible, which is the fiddly bit. Once you have this done (on an extremely stable surface), spreading the beam should yield a series of light and dark concentric rings - interference patterns - because the light is passing through a lens. In the center is a bright spot. You move the lens closer to the pinhole until the bright spot is large enough to cover your subject. Then you close the shutter, turn off the lights, set your plate, and leave.
In order to produce a successful hologram of this type, vibrations and environmental light must be minimized. Blocking light is relatively easy: you set up baffles to keep reflected laser light from hitting the plate, turn off the lights, shut the door, turn off the lights in the next room, and shut that door as well. Blocking vibration is more difficult; Mike Hannum, the awesome Residential College photo/holo prof, built three tables in the basement for this specific purpose. Each one has a bottom layer of 6 inner tubes, then layers of sand and tennis balls for dampening, then more sand and a thick slab of slate on top. It is recommended to work at night, when students are moving around less upstairs and the traffic outside quiets down. And once you've set your unexposed plate in the holder, you leave the room for five minutes to allow the air currents to settle before exposing the plate. Yes. The air currents.
(Do you see yet why I love this art?)
I always picked the table with a shutter switch located outside the room, so I wouldn't have to disturb this setup in order to take the image. Depending on the intensity of the light wash and the reflectivity of the subject, I typically exposed plates for between 5 and 30 seconds. Then, I slunk back into the room, blindly put the plate in a dark sealed box, and brought it out, ablaze with premature triumph. Occasionally, I would end up getting foiled somewhere along the way by developing the plate for the wrong amount of time (this also varies, depending upon the exposure time and such)... but I got some really nice ones along the way, and now I've found my favorite test plates from way back. These and some project materials are now up online, though most of my project work and some of my best overall holograms have been stored elsewhere or given away.
If you want to make simple 3D images but don't have the equipment, check out this awesome handmade hologram video David showed me a while ago... Also pretty frickin' sweet.
Thursday, February 25, 2010


Thursday, February 4, 2010
Juggling balls (Part 1)
Warning: this post may provoke puerile giggling.
Last May, the excellent Bob tried to teach me to juggle. He lent me some balls for the day, and of course I immediately lost one. Now I seem to have recovered from those unfortunate associations, and have been learning to juggle for a couple of weeks. The results are surprisingly marvelous! (YouTube vid. Beware of ball hitting computer at the end...)
These balls are quite heavy, for two reasons: a) it makes them easier to handle as a starting set, and b) the fact that they work my hands/arms is a motivator for practicing. This set is made from latex gloves, filled with (dry) Quikrete. The bag coverings make them easier to handle and much more durable.
 Materials: satiny bag, latex glove, Quikrete (and an empty medicine bottle for scooping)
 Tie off the fingers.
 I used maybe 4 scoops per ball; these photos are of a replacement ball (I lost one), and it ended up larger than the others because I didn't remember how much grit went into the old ones.
 Hefty!
 Satin-y! (Inside out, so it'll end up pretty. The bag is about twice as large as we need, so I twisted it around and stretched it back over itself, à la breadbags.)
 Drawstring pulled tight and knotted; the last step is to tuck it into the fabric so the ball doesn't catch on things.
Final bonus: these make a very satisfying "tup" noise (now that I can actually keep them going without dropping them frequently).
Part the Second coming sometime, in which we explore the more effortful way of making these things...
Friday, January 15, 2010
Sepia!
I found a box of old photography paraphernalia in my family's house; apparently my mom got it at a garage sale some time back. Included are some developing chemicals and flash-pistol cartridges, baffles for creating ornamental borders, etc. (All of this will be documented later.) The information on the flash-pistol cartridge box matches an ad placed in several photography journals from 1909 (go go Gadget websearch!). Included is a half-pound can of "Rumford Baking Powder", emptied out and used to store photo negatives. Some of them are really gorgeous and well-composed. This morning, I got up early and walked through the mist-grey air to scan them... for you!
Below are the negatives; mouse over for positive-adjusted versions! (See what I do for you.)

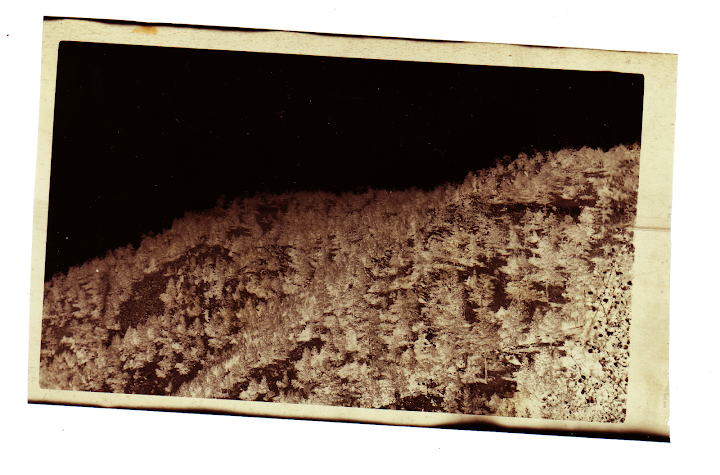


Alas, this one didn't come out well, but the negative looks clearer than that; I know I can get a better image. Try, try again...

Clicking -> Picasa album. These are all the negatives - but there is plenty of photo'ing yet to be done! At some point, I'll share pictures of the rest of the stash (containers, etc.). I'm sharing all of these under Creative Commons (I doubt that the mystery photographer is still alive). You can use and alter them however you want, but please give credit.
Below are the negatives; mouse over for positive-adjusted versions! (See what I do for you.)
Alas, this one didn't come out well, but the negative looks clearer than that; I know I can get a better image. Try, try again...
Clicking -> Picasa album. These are all the negatives - but there is plenty of photo'ing yet to be done! At some point, I'll share pictures of the rest of the stash (containers, etc.). I'm sharing all of these under Creative Commons (I doubt that the mystery photographer is still alive). You can use and alter them however you want, but please give credit.
Thursday, January 7, 2010
Percolating.
I haven't finished anything recently, but that certainly doesn't mean I haven't advanced. I have a sort of book-exploration thing I'm working on, involving such delightful things as mirror poems and inter-language homographs. I've stolen most of the plot and characters from my dreams, which is how I'm getting around my general failure at writing fiction. :)
This is also an excuse to work up a bunch of interesting material. Here are some practice pages from almost a year ago now, when I was being all inspired by old manuscripts (I was taking a Medieval Spanish/Arabic literature course at the time):
 (Text is Mazlaani, my constructed language.)
 (Text is English, written in... well, I don't think we need to give that away. It's a bunch of quotations I like, from a variety of sources.)
 (Basically the same thing.)
Here's a chord wheel for transposition and whatnot; there's some kind of book out there, but the author's wheel makes no sense to me. This is what does. It's a bit janky, visually, but it flows in a logical fashion: you start in the center, and go out to see what chords line up harmonically. If your song uses the first and fourth boxes in a radius, they'll be the same interval apart but in a different key for each other radius. It progresses like cello/viola/violin strings: 7 semitones apart, ascending clockwise. I use this because I'm lazy and find complex chords intimidating.

Friday, December 4, 2009
More near-IR pictures
Edit: many more photos on Facebook. :D
Playing around with the webcam again. It's a GE EasyCam, which was quite easy to customize: the head assembly has two halves that snap apart easily after a screw is removed, and then the whole lens part screws off and that part has the IR filter in back. Pry it out with a needle and cut a couple of tiny squares of black film negative, put them in place (mine fit perfectly under the tabs, w00t), reassemble, done. I realized during the process that you don't even have to remove the stand.
So here's what I've got this afternoon, while the clouds are clearing up but the sun is setting. First, my black sleeves show up lighter than my powder-blue T-shirt:

Lighter even than my (Polish/Viking) skin:

Also, the near-IR spectrum does freaky things to eyes (not just an anomaly in this picture):
 (A goth kid's dream.)
The dark, yellowish-green bushes outside contrast with the more bluish-green fir tree:
 And another for extra credit.

:)
Playing around with the webcam again. It's a GE EasyCam, which was quite easy to customize: the head assembly has two halves that snap apart easily after a screw is removed, and then the whole lens part screws off and that part has the IR filter in back. Pry it out with a needle and cut a couple of tiny squares of black film negative, put them in place (mine fit perfectly under the tabs, w00t), reassemble, done. I realized during the process that you don't even have to remove the stand.
So here's what I've got this afternoon, while the clouds are clearing up but the sun is setting. First, my black sleeves show up lighter than my powder-blue T-shirt:

Lighter even than my (Polish/Viking) skin:

Also, the near-IR spectrum does freaky things to eyes (not just an anomaly in this picture):
 (A goth kid's dream.)
 And another for extra credit.

:)
Saturday, November 28, 2009
Infrared fun
So we were messing about on YouTube, and David found a video about making an IR filter for a digital camera. We determined to attempt this tonight, and I'm quite pleased with my efforts. I used an aggregate process culled from various online tutorials, so the project is by no means original. But it is very fun!
I took a few pictures of the process, but really it's no different than anything else you can find out there. I'm just happy about the output I've got so far, which is up on Posterous... nice video of the mini-blowtorch and a hot needle. Huzzah!
I took a few pictures of the process, but really it's no different than anything else you can find out there. I'm just happy about the output I've got so far, which is up on Posterous... nice video of the mini-blowtorch and a hot needle. Huzzah!
Tuesday, November 24, 2009
Oh. Yes. That.
What? Hmm? You've noticed my flash drive looks a little strange?
Rather like a ray gun, perhaps?
Perhaps.
I'd toyed with the idea of making some steampunk goggles, but for several reasons dragged my feet. A, they're overdone, B, I don't do plastic but hunks of metal + face = cumbersome, and C, I couldn't immediately come up with a solution for the lenses. (Again, I don't do plastic.) But I wanted another project. And then one night I was sitting around, and I realized what I must do with those clock gears I've had laying around my bedroom.
It's time to build a ray gun.
 This will be a secondary blaster, mounted above a larger one and set back a little. I'm currently thinking of making TWO guns, because I have too much excellent stuff to fit on one. I have:
• Clock gears/sprockets
• Burgundy and black suede for the grips (only one grip color for each gun)
• A small purple glass flute vase for a barrel (with ray-shooter mounted inside)
• A double-lensed jeweler's loupe
• Two frightening-looking needles (I think they're for injecting marinade into meat... but for me they shall be ray-focusers):

• Ring of ball bearings, clock part for crosshair, random bit of copper, clock part for trigger:

• 5-gigabyte Rio Carbon that largely died a few years back, but still functions well enough to work as a storage drive:
 I'm particularly excited about this last element. I reshaped the metal backplate to fit more snugly around the thing's guts, and it will be the crowning bit of geekery inside. I've also changed the settings to keep the backlight on, which will give me some red LEDs to display. I also have a ring of 9 white LEDs, which are lovely and bright, so I can even have it be a flashlight as well. Bwaha. Bwahahaha. Bwa... ha.
(I am very happy that this has inspired my friend Link to make himself a raygunlight for use at the office. Excellent, excellent.)
In other news, I brought my mandolin up to North Campus and recorded a far more strange version of "I'm Not Sorry" (steampunk/speculative folk song), with layers and layers of mandolin. I'm very happy about this, as it has much better vocals. I still trip up a couple of times, but my voice isn't all over the place. I also got to sing with Jess when she performed at Café Verde last Saturday; we did "Sons and Daughters" by the Decemberists, an excellent song and oh so improvisable.
Good times.
Subscribe to:
Posts (Atom)

