Friday, January 15, 2010

Sepia!

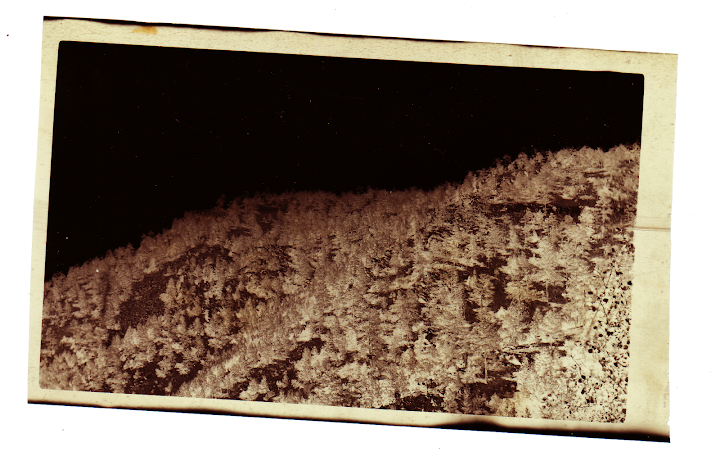
I found a box of old photography paraphernalia in my family's house; apparently my mom got it at a garage sale some time back. Included are some developing chemicals and flash-pistol cartridges, baffles for creating ornamental borders, etc. (All of this will be documented later.) The information on the flash-pistol cartridge box matches an ad placed in several photography journals from 1909 (go go Gadget websearch!). Included is a half-pound can of "Rumford Baking Powder", emptied out and used to store photo negatives. Some of them are really gorgeous and well-composed. This morning, I got up early and walked through the mist-grey air to scan them... for you!

Below are the negatives; mouse over for positive-adjusted versions! (See what I do for you.)


Ooh baby don'tcha know I suffer


Ooh baby can you hear me moooaaaaan


You caught me under false pretenses


How long before you let me go?


Ooohhhhhh, you set my soul alight...


Glaciers melting in the dead of night, and the superstar's sucked into the supermassive...


I thought I was a fool for no one

Alas, this one didn't come out well, but the negative looks clearer than that; I know I can get a better image. Try, try again...


but ooh baby, I'm a fool for you...


Clicking -> Picasa album. These are all the negatives - but there is plenty of photo'ing yet to be done! At some point, I'll share pictures of the rest of the stash (containers, etc.). I'm sharing all of these under Creative Commons (I doubt that the mystery photographer is still alive). You can use and alter them however you want, but please give credit.

Thursday, January 7, 2010

Percolating.

I haven't finished anything recently, but that certainly doesn't mean I haven't advanced. I have a sort of book-exploration thing I'm working on, involving such delightful things as mirror poems and inter-language homographs. I've stolen most of the plot and characters from my dreams, which is how I'm getting around my general failure at writing fiction. :)

This is also an excuse to work up a bunch of interesting material. Here are some practice pages from almost a year ago now, when I was being all inspired by old manuscripts (I was taking a Medieval Spanish/Arabic literature course at the time):

(Text is Mazlaani, my constructed language.)

(Text is English, written in... well, I don't think we need to give that away. It's a bunch of quotations I like, from a variety of sources.)

(Basically the same thing.)

Here's a chord wheel for transposition and whatnot; there's some kind of book out there, but the author's wheel makes no sense to me. This is what does. It's a bit janky, visually, but it flows in a logical fashion: you start in the center, and go out to see what chords line up harmonically. If your song uses the first and fourth boxes in a radius, they'll be the same interval apart but in a different key for each other radius. It progresses like cello/viola/violin strings: 7 semitones apart, ascending clockwise. I use this because I'm lazy and find complex chords intimidating.

Friday, December 4, 2009

More near-IR pictures

Edit: many more photos on Facebook. :D

Playing around with the webcam again. It's a GE EasyCam, which was quite easy to customize: the head assembly has two halves that snap apart easily after a screw is removed, and then the whole lens part screws off and that part has the IR filter in back. Pry it out with a needle and cut a couple of tiny squares of black film negative, put them in place (mine fit perfectly under the tabs, w00t), reassemble, done. I realized during the process that you don't even have to remove the stand.

So here's what I've got this afternoon, while the clouds are clearing up but the sun is setting. First, my black sleeves show up lighter than my powder-blue T-shirt:


Lighter even than my (Polish/Viking) skin:


Also, the near-IR spectrum does freaky things to eyes (not just an anomaly in this picture):

(A goth kid's dream.)

The dark, yellowish-green bushes outside contrast with the more bluish-green fir tree:

And another for extra credit.


:)

Saturday, November 28, 2009

Infrared fun

So we were messing about on YouTube, and David found a video about making an IR filter for a digital camera. We determined to attempt this tonight, and I'm quite pleased with my efforts. I used an aggregate process culled from various online tutorials, so the project is by no means original. But it is very fun!

I took a few pictures of the process, but really it's no different than anything else you can find out there. I'm just happy about the output I've got so far, which is up on Posterous... nice video of the mini-blowtorch and a hot needle. Huzzah!

Tuesday, November 24, 2009

Oh. Yes. That.

What? Hmm? You've noticed my flash drive looks a little strange?

Rather like a ray gun, perhaps?

Perhaps.

I'd toyed with the idea of making some steampunk goggles, but for several reasons dragged my feet. A, they're overdone, B, I don't do plastic but hunks of metal + face = cumbersome, and C, I couldn't immediately come up with a solution for the lenses. (Again, I don't do plastic.) But I wanted another project. And then one night I was sitting around, and I realized what I must do with those clock gears I've had laying around my bedroom.

It's time to build a ray gun.

This will be a secondary blaster, mounted above a larger one and set back a little. I'm currently thinking of making TWO guns, because I have too much excellent stuff to fit on one. I have:
• Clock gears/sprockets
• Burgundy and black suede for the grips (only one grip color for each gun)
• A small purple glass flute vase for a barrel (with ray-shooter mounted inside)
• A double-lensed jeweler's loupe
• Two frightening-looking needles (I think they're for injecting marinade into meat... but for me they shall be ray-focusers):

• Ring of ball bearings, clock part for crosshair, random bit of copper, clock part for trigger:

• 5-gigabyte Rio Carbon that largely died a few years back, but still functions well enough to work as a storage drive:
I'm particularly excited about this last element. I reshaped the metal backplate to fit more snugly around the thing's guts, and it will be the crowning bit of geekery inside. I've also changed the settings to keep the backlight on, which will give me some red LEDs to display. I also have a ring of 9 white LEDs, which are lovely and bright, so I can even have it be a flashlight as well. Bwaha. Bwahahaha. Bwa... ha.

(I am very happy that this has inspired my friend Link to make himself a raygunlight for use at the office. Excellent, excellent.)

In other news, I brought my mandolin up to North Campus and recorded a far more strange version of "I'm Not Sorry" (steampunk/speculative folk song), with layers and layers of mandolin. I'm very happy about this, as it has much better vocals. I still trip up a couple of times, but my voice isn't all over the place. I also got to sing with Jess when she performed at Café Verde last Saturday; we did "Sons and Daughters" by the Decemberists, an excellent song and oh so improvisable.

Good times.

Monday, October 19, 2009

Bleach!

It's been a while since I came across this technique, so I'm not sure where I first heard about it. Anyways, the idea is to take a piece of cloth and paint or spray bleach onto it, to selectively lighten the fabric. This is so fun and simple that I am having a bleach party next weekend; we will throw bleach EVERYWHERE and create MASSIVE DESTRUCTION. (Perhaps I EXAGGERATE slightly.) It will be MARVELOUS!

I have lots of somewhat-ill-fitting solid-color tank tops from thrift shops, so it was easy to pick out some fabric to play with. Natural fibers, of course, work best as they will absorb the bleach. However, the bleach will weaken it, so go easy. I diluted the bleach a little, so I'd have more time to draw before I rinsed and the designs wouldn't appear gradiented. A while back David and I liberated some sheets of plastic from the Art Museum dumpster, and those make excellent mounts: they provide a stable surface and prevent the bleach from leaching through to the other side.

I set up some newspapers and one tub of bleach, one of water. I needed way less bleach -- you really don't use much at all -- though most of that is water, later cast out because I wanted the solution more concentrated. I didn't end up using the gloves either; I did 5 shirts, and my hands are fine. Those brushes have nylon bristles, which held up fine to the bleach, and they will be dedicated for this specific use.

Shirt on long plastic board, which I could rest on my legs and lean against the table as a sort of easel. This was my experimental shirt: I was still getting the concentration right, so there's kind of a crappy drawing of birds and dinosaurs on it now. My drawing technique also improved dramatically over the hour or so it took to do five of these.

Some crappy nature tableau.

Attempt to recreate the Reclamation logo from Templar, AZ (plus identifiers for Soviet 12). All-cotton shirt; brown dye -> pink. Meh.

About 5% cotton tank: took several applications, but that looks kind of cool anyway.

Mandelbrot set tank. 95% cotton, black dye -> pinkish orange. Came out quite nicely, and got a lot of comments. Etsy?

Balloons! Balloons balloons balloons. There's a UFO on the shoulder. All cotton; very fast color change. Kind of pinkish.

A reference to the excellent VURT, by Jeff Noon. Greenish fabric -> yellow.

After painting each shirt, I ran it under a stream of warm water, which worked fine to get the bleach out. At the end, I ran everything through the washer with no detergent (I'm not sure this matters) and the dryer. The lighting was poor by that time, and so result pics will have to wait until this afternoon.

Some observations:
• Colors: Brown dyes and some blacks tend to go pinkish, while greens come out more yellow. Fabric with a low natural fiber content will come out with a fainter design, but it will match the overall color fairly closely. A black 5% cotton shirt bleached to a subtle medium grey, though it took a few applications for the design to really show up.
• Brushes: Small tips offer great control, but they also hold less bleach, which means less of a feathering problem. Bleach mostly stays where it's put. I've heard of using spray bottles, which might be fun to try, but I don't have the patience/control to cut out stencils.
• Fabric: Ribbed material will leave dark lines in the design, unless you want to bleach the hell out of the fabric. So it goes.

Thursday, October 15, 2009

Tea and a blowtorch

Note: Blogger is being a jerkface, so I've put metal-patina photos up on Posterous.

Last week was a good friend's birthday, and I wished to make her something... however, the risk is always making it more of a "you are cool and deserve something unique" thing, rather than "oh look, see what I made". My current solution is to take something I already know they like and tweak it a little. In this case, she's been into rooibos lately, and the local PFC has many excellent tea ingredients in stock (for cheap!). Thus: Rooibos Dream Tea!

Rooibos has a kind of gentle, nutty flavor that is best accentuated with something that cuts the softness; in the past, I've used lemon juice, but I'd rather blend dry flavors. I bought some ingredients that sounded like they'd go well with it: rosehips, hawthorn berries, licorice root, and hibiscsus flowers. It all came to about $5. I first tried hibiscus in tea after having a dream where some friends and I were eating hibiscus flowers, dancing on the moonlit shores of a stream that was lighted from below. Hence, dream tea. The hibiscus imparts a gorgeous, deep red color and delightful tartness to tea, but too much of it is harsh (many commercial teas get this part wrong). Licorice has a strange sweetening effect that comes on as you swallow the infusion, which I find pleasant mostly as a mixer; it doesn't taste like licorice candy. I didn't know beforehand what the rosehips and hawthorn berries would do.

Brewing a little of each ingredient in its own cup, I sampled them along with a mug of the rooibos. The hawthorn berries were disappointing; they imparted almost no flavor (or color). The rosehip brew also didn't taste like much. The licorice was potent and too intense in proportion to the water, and the hibiscus was perfect. I poured some of these last two into the mug of rooibos until I had something delicious, then blended approximately proportionate amounts of raw ingredients, et voilà. A blend to warm the autumn.

•••

Of course, cold weather also calls for fire. Last Christmas, I came into possession of a butane-powered cordless soldering iron, and since then I've been searching for fuel for it (it came empty). A recent flash of inspiration led me to the local smoke shop (Smoka Hookah), and I spent the afternoon experimenting!

Apparently, since high school FIRST Robotics, I've lost any soldering ability I had. I improved after a couple of tries, but got bored of waiting for the tip on the iron to heat up and cool down. So I took the tip off and took the mini-blowtorch to some scrap copper wire, putting a patina of color on its surface. I'm going to experiment with finishes and see if I can seal the color in. I had an issue with thicker copper losing its color as it cooled down, which seems to not happen if I quench it in water once I've got a pattern I like.

•••

Finally, I have long sought an online source for free classical sheet music, and now my friend Murphy has introduced me to Musopen! They also have lots of recorded public-domain music for download. <3